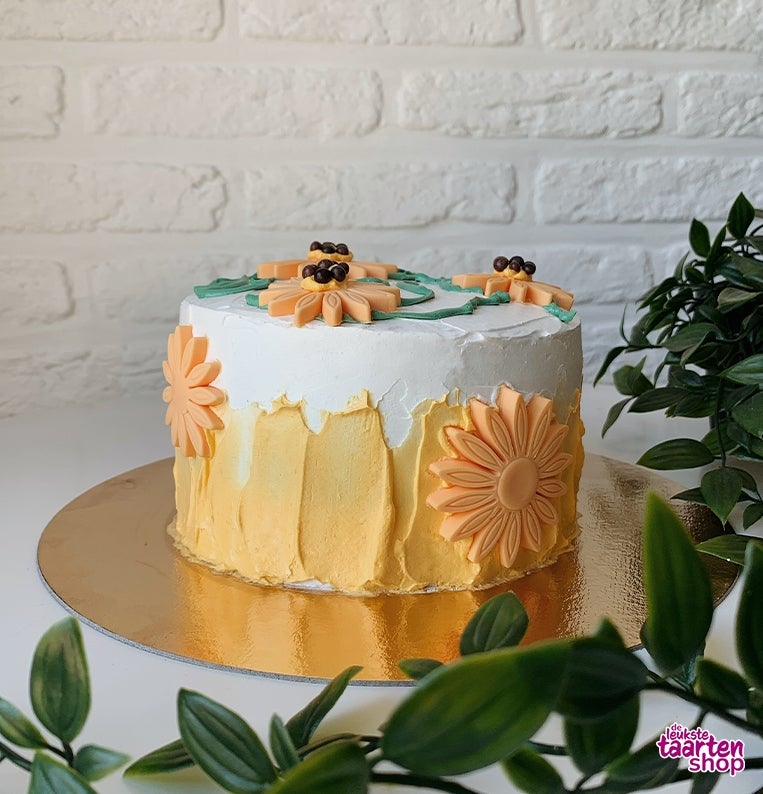
Colorful Limoncello Cake
2 uur
Difficulty: 2/5

Prepare
Ingredients for the Colorful limoncello cake
- Funcakes Mix for Limoncello Cake
- Funcakes mix for Enchanted Cream
- Funcakes fondant tropical orange
- Progel Concentrated Colour Caramel
- Progel Concentrated Colour Holly Green
- 4 eggs
- 175 g butter
- Milk
Other necessities for the Colorful limoncello cake
- PME sunflower/daisy/gerbera plunger cutterset/3
- FunCakes Decorating Bags
- Patisse parchement paper
- Patisse Spatula RVS
- Patisse Silver-Top Rolling Pin
- PME Extra Deep Round Cake Pan
Step 1 Prepare the base of the Colorful limoncello cake
Preheat the oven to 170 ° C (convection oven 150 ° C). Prepare the batter of the FunCakes Mix for Limoncello Cake by mixing it with 175 gram (cream) butter (soft) and 4 eggs. Make sure to mix your batter for at least 4 minutes. This will give you a deliciously light limoncello cake later on. While the oven is preheating, you can already grease your cake tin or cover it with baking paper. Then fill the cake tin with the batter and bake it for 55 minutes. When your cake is done baking, take it out of the oven. Carefully remove your cake from the pan and then place your cake on a wire rack. Let the cake cool completely.
Step 2: Get started with the Enchanted Cream for the Colorful limoncello cake
In the meantime, you can already start preparing your enchanted cream. For the base we use white enchanted cream. Mix 100ml of milk with 75g of enchanted cream. Start on a low setting to let everything dissolve nicely. Then mix on a higher setting to create a solid mix. Blend for at least 2 to 3 minutes.
Step 3: The base of the Colorful limoncello cake
When your cake has cooled down completely, you can start with the first layer of enchanted cream. Make sure your cake is completely cooled down. On a warm cake, enchanted cream becomes very runny very quickly, it is impossible to work with that!
Use a flat spatula and spread some enchanted cream in the center. If you have a turntable, you can place your plate on it. Then place your cake upside down (with the convex side down) in the center of your plate. Spread several mounds of enchanted cream on the sides and top of your cake with the spatula. Then slowly turn your cake while holding your spatula still. This way you can distribute the enchanted cream evenly. So keep your spatula vertically stationary for the side and horizontal for the top. Repeat this until the entire side and top is covered with a layer of enchanted cream. Note: this base coat does not yet have to be fully covering. We take care of that during the finishing process.
Now put your cake in the fridge for 30 minutes. In this way, the enchanted cream can cool down well and become firm. After 30 minutes, check if your enchanted cream has become firm. If not, leave your cake in the fridge for a while.
When the base layer of enchanted cream has cooled down properly, you can start on the second layer. With this layer you will ensure that the enchanted cream is fully opaque and has a nice even finish. You do this exactly the same as with the first layer. When your cake is completely opaque and evenly covered with the enchanted cream, place it back in the fridge for 30 minutes.
Step 4: Prepare the finishing of the Colorful limoncello cake
While the cake is in the fridge, you can get started with the colored enchanted cream. You work exactly the same for both colors. Mix 50ml of milk with 38g of enchanted cream. Then add a little bit of food coloring (caramel / holly green) and mix it on a low setting to let everything dissolve nicely. Then mix on a higher setting to create a solid mix. Blend for at least 2 to 3 minutes. Please note: the longer you mix, the more the enchanted cream will increase in volume. As a result, the color will also become lighter. You can add food coloring during mixing to make the color brighter again.
After mixing, take a separate piping bag for each color and spoon each colored enchanted cream into a piping bag. Squeeze the top well and turn a few times. This way the enchanted cream will drop to the top of the pastry bag. Then tie your decorating bag with a rubber band and put the two decorating bags in the fridge.
Step 5: Fondant sunflowers for the Colorful limoncello cake
Then you will start preparing the sunflowers out of fondant. Place a sheet of baking paper on your counter, cut off a piece of the fondant and roll it out with a rolling pin to about 3 to 4mm thickness. Then use the PME cutters to prick sunflowers in different sizes from your fondant. You can keep the fondant you have left in a resealable bag for your next baking adventure.
After 30 minutes, check if your enchanted cream has become firm again. If not, leave your cake in the fridge for a while.
Step 6: Finish the Colorful limoncello cake
Now you can start finishing the cake. We start with the caramel-colored enchanted cream. Cut the tip of the pastry bag. Put a little bit of caramel-colored enchanted cream every centimeter around the base of your cake. When you have done this, take a spatula. With the spatula you then spread each tuft of caramel-colored enchanted cream vertically upwards. This way you create the feeling of sunflower petals around your cake.
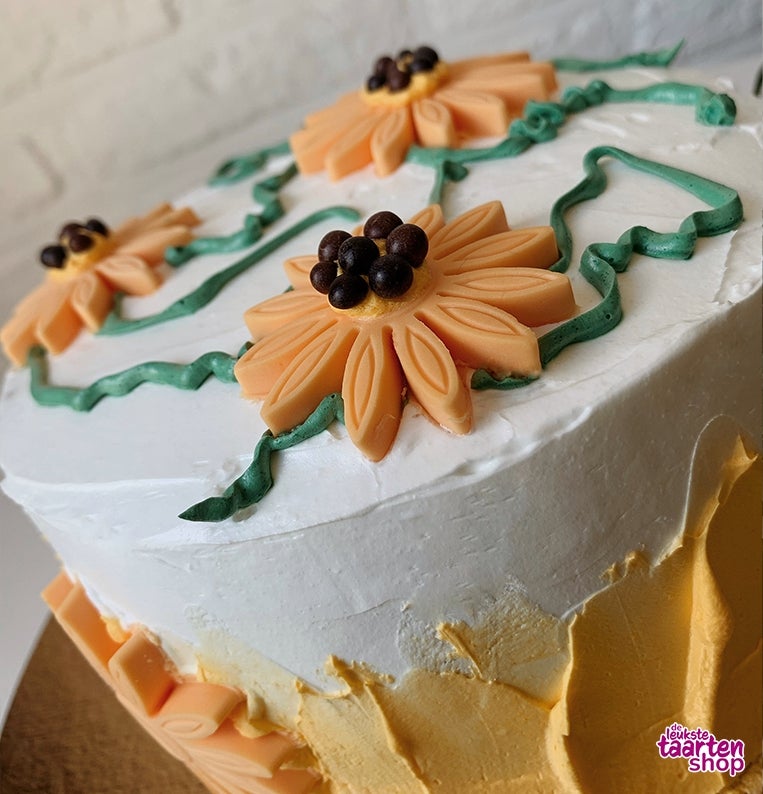
Then we move on to the holly green enchanted cream. Cut the tip of the pastry bag. Gently squeeze your pastry bag so that you can draw narrow strands on the top of your cake. Let your creativity run wild!
After the decoration with the colored enchanted cream, it is now time to place the fondant sunflowers on the cake! You do this by feeling. You can use as many or as few as you want. Take a look around on your cake where you would like sunflowers. If there is a spot on your cake that you think is less beautiful, it may be just the place to put a sunflower to hide that less beautiful spot.
As a finishing touch, add a sprinkle of caramel-colored enchanted cream in the center of each sunflower and sprinkle some chocolate sprinkle on top. This makes it look even more like a sunflower!
After finishing, put your cake back in the fridge for 30 minutes. Enjoy!!
Required products
Note: Always check product availability before placing an order.


